


Rivian R1S Car Camping Setup 2.0


Last year, I published The Ultimate Rivian R1S Car Camping Guide. The feedback was incredible, but as any seasoned camper knows, the gear and the grind never stop evolving. Eight camping trips later, I’ve refined my setup for peak efficiency and comfort.
While I’ve owned the entire Tesla S3XY lineup, the Gen 2 Rivian R1S Dual Max is currently my daily and best choice for camping. It’s certainly not the most efficient EV on the market, and the autonomy software still plays second fiddle to Tesla, but for car camping? It’s in a league of its own. Here is why.

If you're thinking about getting a Rivian, feel free to use my referral code IVAN4331098. You'll get 3 months of free charging on the Rivian Adventure Network and a $500 credit for the Gear Shop, and yes I'll get the same. Win-win!
AMPLE STORAGE
The R1S remains one of the largest electric SUVs available in the U.S., and that three-row footprint is a goldmine for campers. Between the oversized frunk (SO GOOD) and the deep sub-trunk, there is a dedicated home for every piece of gear.
To level up, I installed a Mars Adventure Gear roof rack with crossbars to house my storage boxes, water tanks, and Starlink mini. At 6'3", space is usually my enemy, but sleeping in the back with my 5-year-old is surprisingly roomy. We never feel cramped, even with a full load of supplies.
SUFFICIENT ONBOARD ENERGY
With the Max pack configuration, I have 140 kWh of usable energy at my disposal. My golden rule is to arrive at camp with at least 70% state of charge, which comfortably powers a 2–3 night stay.
Pro Tip: Always map out your nearest DC fast charger before settling in so you know exactly how much "fuel" you can afford to burn.
On a recent trip to Whitney Portal, temperatures dropped to the 30s at night. I kept the cabin at a cozy 75°F, running the HVAC for 12 hours each night. Over two nights, I consumed roughly 25% (35 kWh) of the battery. That’s a small price to pay for a climate-controlled "tent."
AUTO-LEVELING: THE GOOD AND THE ANNOYING
Sleeping on a tilt is a recipe for a bad morning. Rivian’s Camp Mode includes an auto-leveling feature that works wonders, but the user experience is still stuck.
Currently, you have to stay in the driver’s seat while the vehicle levels, and the feature is only accessible via the Center Information Display (CID). It’s a bit of a head-scratcher why this isn’t in the mobile app yet. Considering the process can take anywhere from 5 to 8 minutes, being able to trigger it from outside while I unstow my gear would be a total game-changer.
OFF-ROAD PERFORMANCE & CAPABILITY
If your idea of camping goes beyond paved pads and electrical hookups, the Rivian is peerless. Its off-road capability allows you to reach remote, breathtaking locations where a Model X or Model Y would simply bottom out. It transforms "car camping" into "overlanding light."
ADVANCED DRIVING ASSIST SYSTEM
While Rivian’s Autonomy+ isn't quite at the level of Tesla’s FSD, I still did my one-time purchase ($2,500). It is a massive asset on long hauls. On my last trip, I cruised Highway 395 hands-free for hours. It significantly reduces road fatigue, letting you arrive at the campsite with enough energy to actually enjoy the outdoors.
FAST CHARGING
Living in California, the Rivian Adventure Network (RAN) has been incredibly robust and every bit as reliable as Tesla’s Superchargers. I generally avoid third-party DC chargers—nothing ruins a trip faster than pulling up to a "broken" station.
With the newer models now sporting a native NACS port, range anxiety is completely gone (in many states). Whether I'm using a RAN site or a Tesla Supercharger, the experience is fast, easy, and seamless.

SO...WHAT DID I ADD/CHANGE?
EXTERIOR
For an EV, the goal is always to minimize drag; excess wind noise and range loss are the enemies of a good road trip. To solve this, I’ve shifted my heavy storage to the back of the vehicle. I installed the RambleSwing® Pro from Rig'd Supply, and I added their foldable camp table and accessory pole for mounting propane cylinders.
To maximize my hauling capacity without sacrificing efficiency, I paired the swing-out rack with a Pakmule Scout carrier. Because it sits in the slipstream behind the R1S, I can carry additional gear with virtually zero impact on my range. Both pieces of hardware are rock-solid and have been absolute game-changers for my trips.
People often ask me about my "go-to" tie-downs. After testing dozens of options, I only recommend two: the incredibly versatile MODL Infinity Tool 2.0 and Rollercam straps. They are simply the best in the business, no need to look elsewhere. Both are available on Amazon, so you can try them out risk-free.
To finish my exterior setup, I mounted my Starlink mini on my rooftop so I have access to civilization wherever I roam.
Here are the items I purchased, installed, and used in almost every trip:
If you're thinking about getting a Rivian, feel free to use my referral code IVAN4331098. You'll get 6 months of free charging on the Rivian Adventure Network and a $500 credit for the Gear Shop, and yes I'll get the same. Win-win!
INTERIOR

Eight trips in, and the custom Hest Foamy mattress for the Rivian R1S continues to impress. It strikes an excellent balance of comfort and insulation, boasting a solid R-value that keeps the chill at bay. While the covers are conveniently machine washable and setup is straightforward, there is a trade-off: they are somewhat bulky and a bit of a workout to roll up (nearly impossible to do it in the R1S). To streamline my arrivals, I typically set them up before leaving home so the sleep system is ready the moment I reach camp.
I’ve also integrated the Irvlabs center MOLLE system, which has been a game-changer for versatility. It turns underutilized space into a dedicated gear hub. Right now, I have my first aid kit, sunglasses, drone, and a small gimbal camera all within arm's reach, along with my NACS adapter, neatly organized and ready to go.

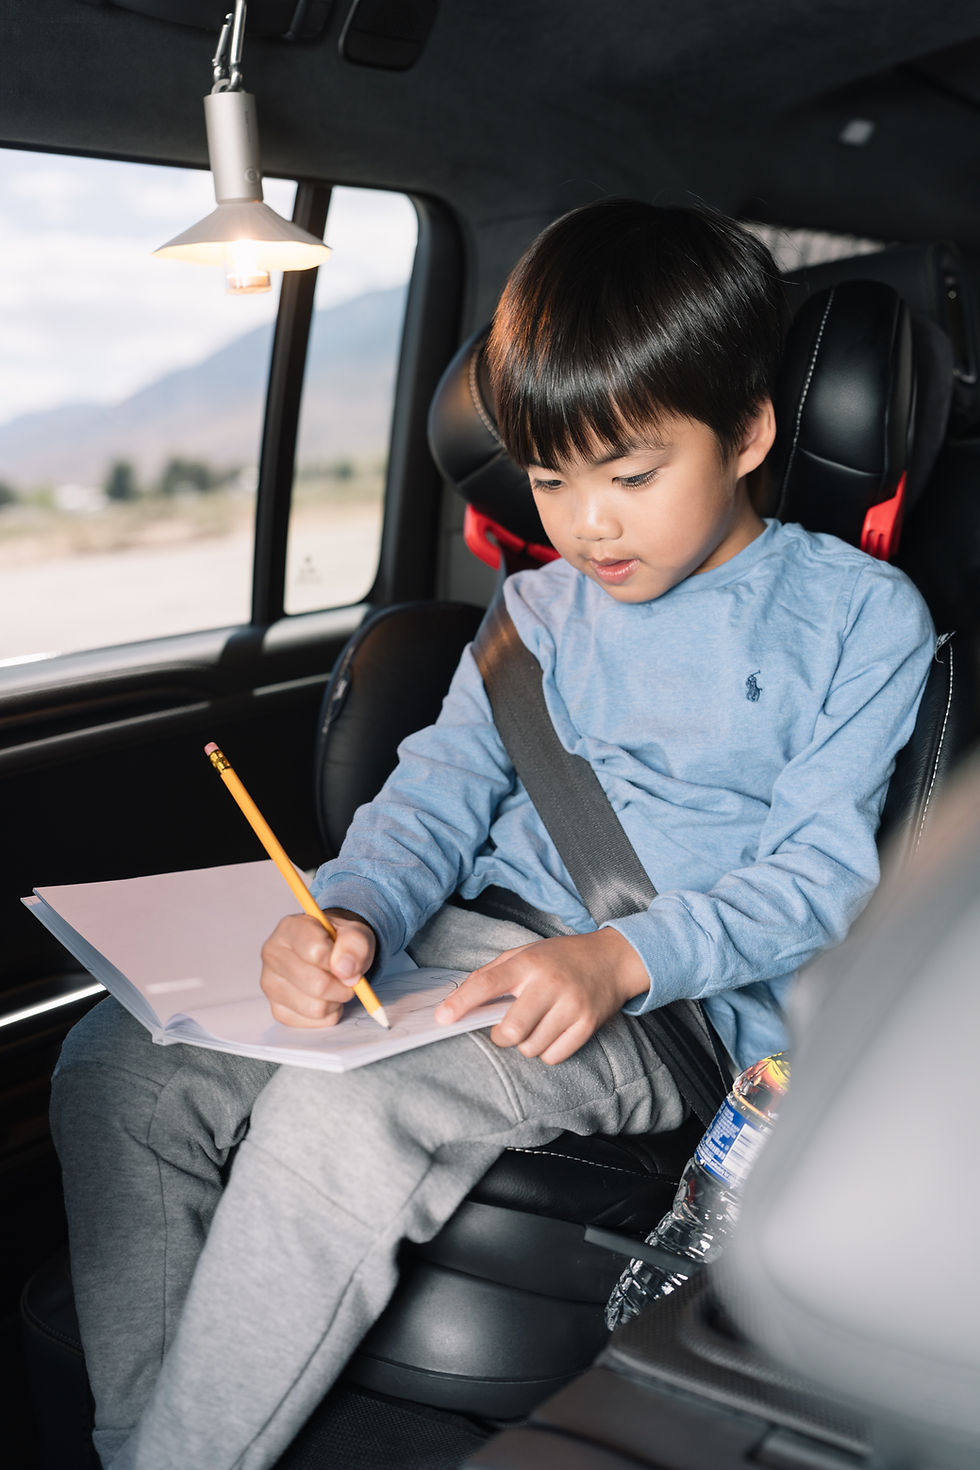
For the kid’s entertainment, I used the official Seatback Device Holder to mount my iPad Pro. It’s been a game-changer on longer trips with my little camping buddy. Since I heavily tinted the windows and added a sunshade for the glass roof, a rechargeable camp light has come in handy, and the little one loves it too.
Here are the items I purchased, installed, and used in almost every trip:

SHOWER/TOILET
Dry camping in remote locations is where the real magic happens: stunning views and total solitude. However, the trade-off is the lack of infrastructure. For someone like me, who maintains a "clean house" policy inside my rig (food is not allowed and kids need to take off the shoes), pit toilets and grimy public facilities are deal-breakers. To bridge the gap between rugged remote sites and personal hygiene, I’ve moved away from an all-electric setup for water heating, as it’s often inefficient for high-demand tasks.
Instead, I utilize a Camplux instant propane water heater paired with a swing-out privacy curtain from Dirtbox. In my experience, eight gallons of water provides two comfortable showers, though I recommend testing your own consumption at home first. While I’m eyeing a more compact, mountable Joolca system for the future, the current solution works just fine (just not as compact and easy to deploy).
As for the toilet, dry flush is the cleanest and most odor-free solution available. The only drawback: cost per flush is on the higher side.
I'll proboably write up a stand alone shower system review at a later time!
Items I purchased, installed and used in my shower/toilet system:
COOLER
Finally, the most significant upgrade to this build: the cooling solution.
In my previous car camping guide, I recommended the ICECO APL35 aluminum fridge aluminum fridge because of its perfect fit in the subtrunk. While that remains an excellent fridge, my current setup with a rear swing-out rack and camp table makes accessing the subtrunk a bit of a chore. To streamline my workflow, I decided to find a high-performing cooler that fits in the frunk for instant access.
After keeping an eye on the Oyster cooler, I finally pulled the trigger. To put it to the test, I loaded it with two factory ice packs and four additional stainless steel packs from Amazon. Honestly, I was skeptical about how long a "powerless" solution would hold up.
I headed out Friday morning and returned Sunday night, but in the post-trip haze, I actually forgot to unpack it. It wasn't until Monday night that I remembered my leftovers and drinks were still inside. When I opened it, everything was still perfectly chilled. For a cooler that fits seamlessly in the frunk and requires zero wiring, this is a total game-changer for quick-access storage.
If you're thinking about getting a Rivian, feel free to use my referral code IVAN4331098. You'll get 6 months of free charging on the Rivian Adventure Network and a $500 credit for the Gear Shop, and yes I'll get the same. Win-win!
///Some of the links used in the guide will direct you to Amazon, as an Amazon Associate, I earn from qualifying purchases at no additional cost to you.///


Comments